Wednesday, January 27, 2010

Valentine Picture Frames

This project is so simple! 
Ok, pull out your Cricut, a frame, and some ribbon.  I found this frame at the dollarstore.  It measures 4 x 81/2. 
To cut the vinyl I used the Alphaliscious cartridge and cut the letters at 3 inches.  The hearts were from the George cartridge cut at 1 inch.  (When cutting vinyl I have found it is easiest to use a lower pressure(2) so you only cut through the vinyl.  That way it peels off like a sticker.)  Using transfer paper would be a good idea too, I didn't, but just because I don't have any on hand.
I used the line on the matt to line up the vinyl.  Making a line with masking tape would work well too.
I removed the screws and backing then used hot glue to attach the glass and ribbon to the frame.
Easy, cheep, and cute!
Go make one, then show me your ideas.  There are so many options.  In fact I have another idea with this project I'll show you as soon as I make it to the craft store!

I linked to:

Photobucket 

Monday, January 25, 2010

burlap ♥

Have you seen these cute burlap hearts? 


I was sitting around last night and thought, I'm going to make one. 
So I pulled out some wire and the rest of the burlap I had on hand and this is how it turned out.  I already have a cute something on my door so I thought I would scale it down a little. I cut the burlap strips about 1and a half to 2 inches wide.  I didn't really measure, just cut away. 
So easy and cute!


Saturday, January 23, 2010

8x10 Chalkboards


These smaller chalkboards are great for playing with anywhere! 
My kids had a great time playing with them in their beds last night!  A long car trip would be a perfect time to pull them out.

I followed the same idea from the big frame, but added a padded bottom to make them more comfortable and cute!

For the pad I started with a piece of cardboard I cut to the same size as my frame.  I got these wooded frames at Wal-mart for $3 each.


Then I cut the batting to size.  I actually cut a long strip of the batting and "rolled" it up several times.

Cut the fabric a couple inches larger than the board and batting.

Using hot glue I went around the edges gluing the fabric to the cardboard keeping the fabric taught.


To give it just a little more I measured the center of the pillow and with embroidery floss and a large needle I stitched a few stitches.

Tie it with a good knot.

It adds just the right touch, don't you think?  You could add a button, or do two stitches.

I sanded down the corners of the frames.  They were a bit sharp.

This ocean blue is a favorite of mine.  I am on a bit of a teal and red kick.  They are so fun together!
I did sand a couple of them to give them that distressed look.  I followed it up with a matte top coat.  Kaylee wanted hers sparkly.


I cut the chalkboard to fit inside the frames and glued it in with the same construction adhesive. 
*Again, put the board in the frame, then glue it so the glue doesn't ooze out onto your project.

After the glue was dry I used hot glue to attach the pad onto the back.
There you have it! 
A fun portable chalkboard.
My niece will be getting one for her birthday!

Bottle Cap Hair Clips

These are the cutest bottle caps I have ever seen.  I love this addition to the flowers that are so popular. 
I can't wait to try this one!

Here's the link:

Thursday, January 21, 2010

Chalkboard

A new chalkboard for my little boy's room!

Want to see how I did it?
These are the paints, primer, and glue I used. 
I bought the board at Home Depot.  It was about $4 for a 2x4 ft piece.
I started with 2 coats of Kilz latex primer($7).
 Then I sanded it smooth.
I followed it with 4 coats of the chalkboard paint($10).
Then I marked the wood and cut it to fit the frame.  I should have cut the wood, then painted it in case there was a problem I wouldn't have to start over.  Luckily everything turned out ok.
I spray painted the frame blue, then coated it with a clear matte spray paint.  I also used L brackets to brace it because it was wobbly.  I should have put them on first thing to prevent the wobbliness as I worked with it.
After I cleaned out the old glue and staples I used the construction adhesive to glue the chalk board into the frame.  *Something I found was that it was better to put the board into the frame, then glue it.  If you glue it, then put the board in the glue will squish out onto the chalk board.
Let it dry and there we go! 
Hang it up and draw away. 
(Oh, It already had hardwear to hang it with).
Get your hands on a frame and make something awesome for your kids room or kitchen.
This is going to look great in the little guys room! 

I can't wait to show you the project I made with the rest of the chalk board.

Sunday, January 10, 2010

Frame

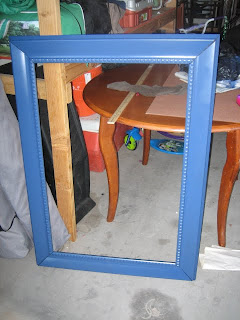
I've been working on something....And I hope it turns out as well as I am expecting it to. There have been a couple of kinks, but I am working them out.


My neighbor had a pile of "free stuff" in his driveway a couple of weeks ago. I saw from across the street this beautiful piece of junk...how exciting! So I scurried over and snatched it up. Then the wheels got a turning. What can I do with this lovely free frame? Then it came to me....
But it's not quite done yet.  Just a couple more days...
I am so excited!

What would you do with a large empty frame?

Wednesday, January 6, 2010

A look back at 2009

These are some of my favorite projects from this past year. Most of these I posted on our family blog, but I thought I would start off this new year with a look back.